LaTeX Skeleton Document Set-up with Python and Jinja
08 Jul 2022
- Aren’t hummingbirds a LaTeX mascot?
(Calpyte anna, observed by Dario Taraborelli))*
I’ve learned quite a bit about developing LaTeX documents for work. For long documents, a good set-up is having a main TEX (e.g. main.tex) file import numerous TEX files that correspond to the document sections. The introduction would be one TEX file, an appendix would be another TEX file, etc.
But it can be a somewhat tedious task to set-up this sort of documents. Starting a new document with this structure usually involves: copy + pasting a similar Overleaf project, add/removing content as needed, and making tweaks throughout the files so that everything is imported correctly, etc. If there is no prior example to copy, the document has to be built from scratch. Only when it is set-up can the meat-and-potatoes, the actual document content, be added. I figured anything that could be done to get to the good stuff faster, the better.
My solution was a Python script that automates the set-up using three components: (1) a document outline defined in a YAML file, (2) Jinja templates for the main and sub tex files, (3) static files that are included in the document.
Configuration Data
The python script loads in configuration data from a YAML file. The configuration data is where the outline is set, i.e. “Sections” and “Appendices”, as well as some other parameters.
1
2
3
4
5
6
7
8
9
10
11
12
13
14
15
16
17
18
out_dir: out_doc_1/
static_dir: static/
templates_dir: templates/
template_main: main.tex
template_sub: sub-plus.tex
doc_title: Generic Test Document
Sections:
  - Hipster Ipsum
  - Taco Wayfarers:
    - Hammock Readymade
    - Single-Origin Coloring Book:
      - VHS
      - Post-ironic Slow-carb
      - Copper Mug Yes Plz
Appendices:
  - Banjo Greenjuice
  - Roof Bar Chia Seeds
  - Mumblecore Distillery
The Templates
I used the Jinja template engine to create two templates for the document set-up: one for the main tex file and one for sub files that are imported into the main file.
main.tex
This template starts out like a normal LaTeX document set-up. The document title at the top is set from the loaded configuration data. Note the “00a_Introduction” import. That file is not generated by a template, but will be included in the document as a “static” file.
1
2
3
4
5
6
7
8
9
10
11
12
13
14
15
16
17
18
19
20
21
22
23
24
25
26
27
28
29
30
31
32
33
34
35
36
37
38
39
40
41
42
43
44
45
%==================================================================
%==================================================================
% LATEX PREAMBLE
%==================================================================
%==================================================================

    \documentclass{myArticleClass}
    {%- set doc_title = "{" ~ doc_title ~ "}" %}
    \title{{ doc_title }}
    \author{Austin Pursley}

%==================================================================
%==================================================================
% DOCUMENT CONTENT
%==================================================================
%==================================================================
    \begin{document}

%========================================================
% PREFACE
%========================================================

    %-------------------------
    \maketitle
    \pagenumbering{roman}

    %-------------------------
    \clearpage
    \import{Sections/}{00a_Introduction}

    %-------------------------
    % Tables of Contents, Tables, Figures...
    \clearpage
    \tableofcontents
    \newpage
    \begin{center}
    \lhead{}
    \listoftables
    \newpage
    \listoffigures
    \end{center}
    \clearpage

    \pagenumbering{arabic}
    \glsresetall % Resets the acronym markers from preamble
The next part is for import statements. Each section of the document will correspond to a subfile that will be imported into the main document.
The templating code itself is pretty straight forward. A for loop is used to iterate over a dictionary object that holds the section data.
1
2
3
4
5
6
7
8
9
10
11
12
13
14
15
16
17
18
19
20
%========================================================
% BODY
%========================================================

	\pagenumbering{arabic}
	\glsresetall % Resets the acronym markers from preamble

	{% for s in sections -%}
	{%- set fn = "{" ~ s.filename ~ "}" -%}
	%-------------------------
	% {{ s.title }}
	\clearpage
	\import{Sections/}{{ fn }}

	{% endfor -%}

	%-------------------------
	% References
	\clearpage
	\printbibliography[heading=bibnumbered,title={References}]
The same is done for appendices…
1
2
3
4
5
6
7
8
9
10
11
12
13
14
15
16
17
18
19
20
21
22
23
24
25
26
27
%========================================================
% APPENDICES
%========================================================

	\clearpage
	\renewcommand{\appendixpagename}{\center{\Large{Appendices}}}
	\appendix
	\begin{appendices}
	\glsresetall % Resets the acronym markers from main document

	{% for a in appendices -%}
	{%- set fn = "{" ~ a.filename ~ "}" -%}
	%-------------------------
	% {{ a.title }}
	\clearpage
	\import{Appendices/}{{ fn }}

	{% endfor -%}

	%-------------------------
	% Glossaries
	\clearpage
	\printglossary[type=main,style=list]
	\printglossary[type=abbreviations, title={Acronyms}]
	\end{appendices}

	\end{document}
…and that’s the end of the main template.
sub.tex
The subfile template holds the content for each section. In addition, each section may have subsection, and those subsections may have “subsubsections”.
1
2
3
4
5
6
7
8
9
10
11
12
13
14
15
16
17
18
19
20
21
22
23
24
25
26
27
28
29
30
31
\documentclass[class=myArticleClass, float=false, crop=false]{standalone}
\begin{document}

%==================================================================
%==================================================================
%  {{ title | upper}}
%==================================================================
%==================================================================
{%- set title = "{" ~ title ~ "}" -%}
{%- set label = "{" ~ label ~ "}" %}
\section{{ title }}
\label{{ label }}

{% for s in subsection %}
{%- set title = "{" ~ s.title ~ "}" -%}
{%- set label = "{" ~ s.label ~ "}" %}
%==========================================================
%==========================================================
\subsection{{ title }}
\label{{ label }}
{% for ss in s.subsection %}
{%- set title = "{" ~ ss.title ~ "}" -%}
{% set label = "{" ~ ss.label ~ "}" %}
%--------------------------------------
%--------------------------------------
\subsubsection{{ title }}
\label{{ label }}
% SOURCE:
{% endfor %}
{% endfor %}
\end{document}
The Build Script
The outline data are imported in as dictionary.
1
2
3
4
5
6
7
8
9
10
11
12
13
Sections:
 ['Hipster Ipsum',
 {'Taco Wayfarers':
    ['Hammock Readymade',
    {'Single-Origin Coloring Book':
        ['VHS', 'Post-ironic Slow-carb',
        'Copper Mug Yes Plz']}
    ]
 }]
Appendices:
 ['Banjo Greenjuice',
 'Roof Bar Chia Seeds',
 'Mumblecore Distillery']
The script will add associated filenames and labels. The filenames are for each section/appendix TeX subfile. Labels are based off the level of the section and an acronym of the title. There is even a check to make sure duplicate labels are not created.
The resulting data looks like:
1
2
3
4
5
6
7
8
9
10
11
12
13
14
15
16
17
18
19
20
21
22
23
24
25
26
27
 'doc_title': 'Generic Test Document',
 'sections':
        [{'filename': '01_HipsterIpsum',
          'label': 'sHI',
          'title': 'Hipster Ipsum'},
         {'filename': '02_TacoWayfarers',
          'label': 'sTW', 'title': 'Taco Wayfarers',
          'subsection': [{'label': 'ssHR', 'title': 'Hammock Readymade'},
                         {'label': 'ssSCB', 'title': 'Single-Origin Coloring Book',
                          'subsection':
                            [{'label': 'sssV', 'title': 'VHS'},
                             {'label': 'sssPS',
                              'title': 'Post-ironic '
                                       'Slow-carb'},
                             {'label': 'sssCMYP',
                              'title': 'Copper Mug Yes Plz'}]
                          }]
           }],
 'appendices': [{'filename': 'A_BanjoGreenjuice',
                'label': 'aBG',
                'title': 'Banjo Greenjuice'},
               {'filename': 'B_RoofBarChiaSeeds',
                'label': 'aRBCS',
                'title': 'Roof Bar Chia Seeds'},
               {'filename': 'C_MumblecoreDistillery',
                'label': 'aMD',
                'title': 'Mumblecore Distillery'}]
The templates are then rendered with the data and the output is written to files.
1
2
3
4
5
6
7
8
9
10
11
12
13
14
15
16
17
18
19
20
21
22
23
24
25
26
27
28
29
30
31
32
33
# set-up Jinja template environment
templateLoader = jinja2.FileSystemLoader(searchpath=templates_dir)
templateEnv = jinja2.Environment(loader=templateLoader)
main_temp = templateEnv.get_template(temp_main_fn)
sub_temp = templateEnv.get_template(temp_sub_fn)

# ...

# render templates
main_tex = (main_temp.render(data))
p = Path(out_dir + "main.tex")
with open(p, 'w') as f:
    f.write(main_tex)

for s in data["sections"]:
    data = {"title" : s["title"],
            "label" : s["label"]}
    if "subsection" in s:
        data["subsection"] = s["subsection"]
    sub_tex = (sub_temp.render(data))
    p = Path(sec_dir + s["filename"] + ".tex")
    with open(p, 'w') as f:
        f.write(sub_tex)

for s in data["appendices"]:
    data = {"title" : s["title"],
            "label" : s["label"]}
    if "subsection" in s:
        data["subsection"] = s["subsection"]
    sub_tex = (sub_temp.render(data))
    p = Path(apx_dir + s["filename"] + ".tex")
    with open(p, 'w') as f:
        f.write(sub_tex)
Finally, the static files are copied. This includes content such as the document class file, any images, and data for the bibliography, acronyms, etc.
1
2
3
4
5
6
# copy "static" files
if isinstance(static_dir, str):
    copy_tree(static_dir, out_dir)
elif isinstance(static_dir, list):
    for d in static_dir:
        copy_tree(d, out_dir)
Result
The end result is a sort of “skeleton” document ready for content.
The PDF output result can be seen here.
GitHub for the code.
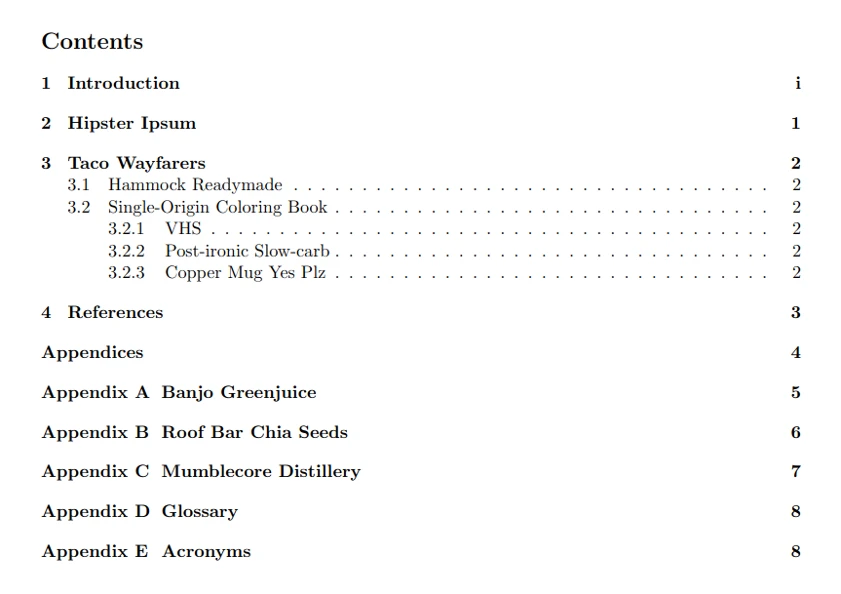 Table of contents in output PDF document.